 Mother's Day is right around the corner and this would make a great gift to any gadget loving mom!
Sunday, April 29, 2012
Shop Update
Mother's Day is right around the corner and this would make a great gift to any gadget loving mom!Friday, April 27, 2012
Needle & Thread
Hello! Just wanted to let you know that I'm over at Sew Delicious today for Ros's Needle & Thread Interview series! I'm so honored that she chose me for an interview (Thanks Ros!!). It was really nice getting to reflect on my past work while answering her questions and looking back at the projects I'm most proud of. Stop by and say hi if you have a chance today!

Wednesday, April 25, 2012
A Graduation Gift
I'm so proud of my cousin, Erica, who is graduating as a Dental Hygienist in a few weeks! My family and I are going up there for her graduation and I wanted to make her something special.
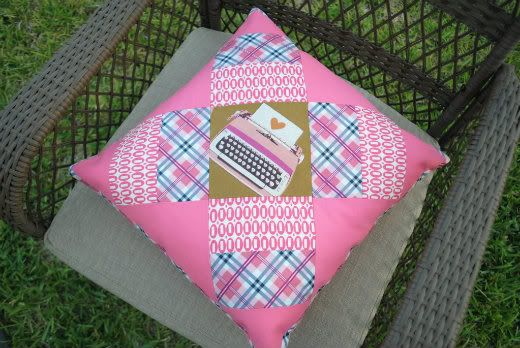
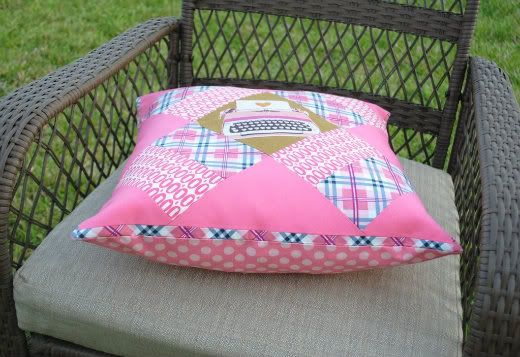
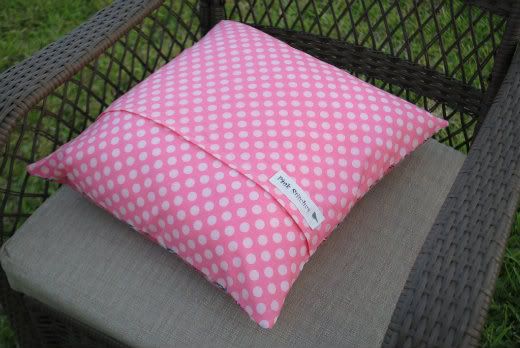
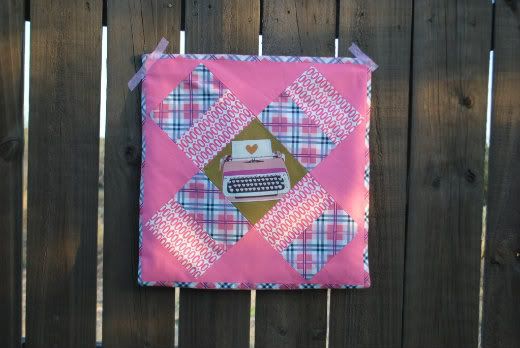
I based the entire layout around the typewriter from Melody Miller's most recent line. I added American Jane pezzy print in pink and a pretty pink plaid from Denyse Schmidt's "Aunt Edna" collection. I tied everything together with a coral linen as a background. For the backing, I used Michael Miller Ta Dots in Bubble gum. Hope she loves it!
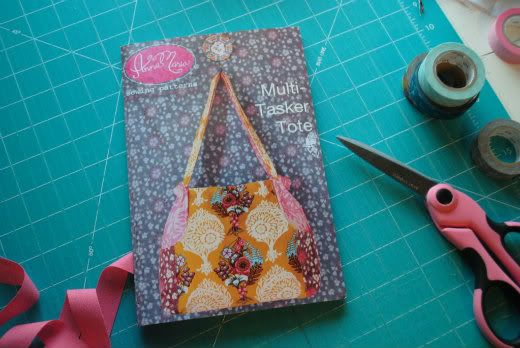
Next on my agenda is this Multi-Taster Tote by Anna Maria Horner. I'm thinking my Flea Market prints would be PERFECT for this bag. Can't wait to get it done!
I based the entire layout around the typewriter from Melody Miller's most recent line. I added American Jane pezzy print in pink and a pretty pink plaid from Denyse Schmidt's "Aunt Edna" collection. I tied everything together with a coral linen as a background. For the backing, I used Michael Miller Ta Dots in Bubble gum. Hope she loves it!
Next on my agenda is this Multi-Taster Tote by Anna Maria Horner. I'm thinking my Flea Market prints would be PERFECT for this bag. Can't wait to get it done!
Tuesday, April 24, 2012
Patchwork Tote
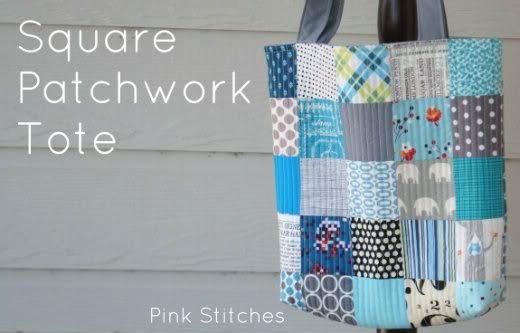
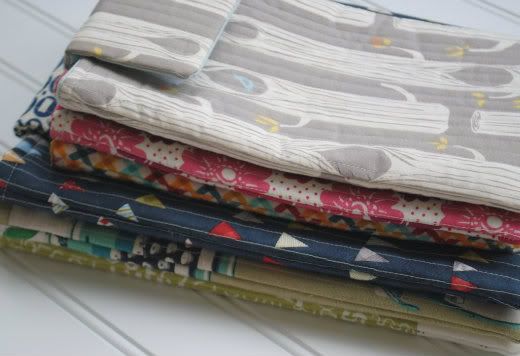
I've been sorting through all my scraps and cutting a bunch of 3.5" squares. Anything smaller got tossed in the trash, except ofcourse for the beautiful little pieces that I couldn't bring myself to part with. I thought it would be fun to make a patchwork tote using some of my blue and grey squares.
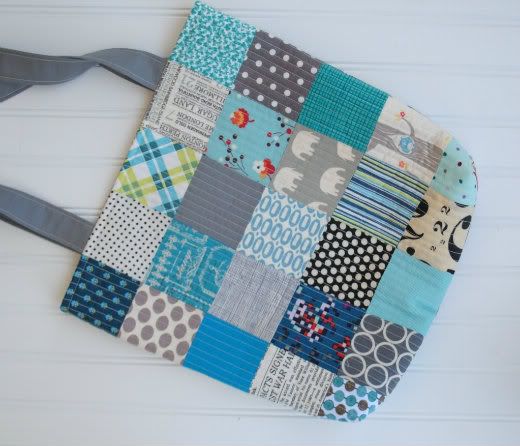
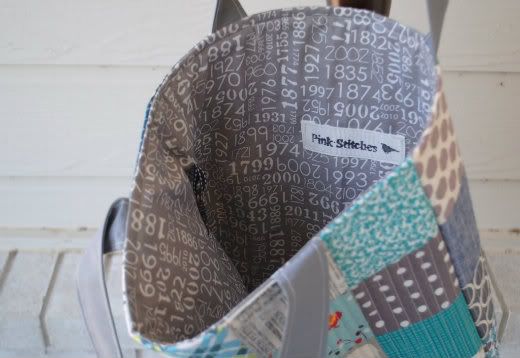
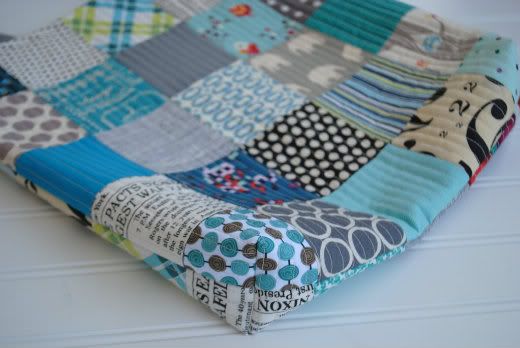
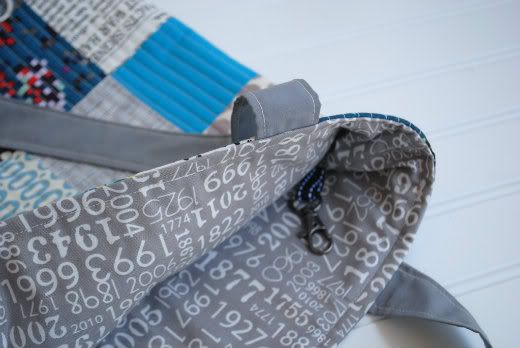
I used 25 squares for each side of the bag and sewed them together in five rows of five squares, alternating between grey and blue. Then I quilted them in straight lines before composing my tote. I boxed the corners at 2.5" and added a little lobster clasp to the lining to hang keys or coin purses from. The tote is now in the shop if anyone is interested. Have a wonderful week!
Linking up to these parties.
Monday, April 23, 2012
Seven Years Strong
Today is a really special day! Seven years ago, I married the love of my life. I'm convinced that I'm the luckiest girl in the world. He is the most loving and supportive husband and he still takes my breath away with his sweet words and romantic gestures. I won't bore you with pictures of us like I did last year but I did want to share a few pictures from our little trip to Sea World last weekend.


Oh and I couldn't sign off without bragging a little bit. It's my anniversary after all! Honey did good. He knows I love my purses!


Oh and I couldn't sign off without bragging a little bit. It's my anniversary after all! Honey did good. He knows I love my purses!
Thursday, April 19, 2012
Leap Pad Case Tutorial
**If you have used this tutorial or any others by Pink Stitches, please post your pictures on the Pink Stitches Flickr Group! I'd love to see your beautiful creations and feature some of my favorite projects!**

I have been getting a lot of emails inquiring about the Leap Pad Case I had made for AJ. I had put together a pattern that was meant to be tested by some readers and then put in my etsy shop for sale. However, with the closing of my etsy shop, all those plans went out the window. Although, I have since re-opened my shop (yay!), I decided to post the tutorial on my blog for free instead. Thank you all for being so patient!

For this project, you will need the following materials:
- Three different kinds of fabric
- 10" zipper
- 3.5" of sew-in velcro
- cotton batting
- lightweight fusible interfacing (optional)

First off, you're going to cut your zipper lining and flap pieces:
- cut one piece at 7.25" x 9"
- cut one piece at 3.25" x 9"
- cut one piece at 4" x 9"
- cut two pieces at 3.5" x 6.5"

Now you're going to cut your main exterior panels and fusible interfacing:
- cut one piece of main fabric and interfacing at 7.25" x 9"
- cut one piece of main fabric and interfacing at 3.25" x 9"
- cut one piece of main fabric and interfacing at 4" x 9"
Iron the fusible interfacing to the wrong side of these fabric pieces according to the directions on your interfacing.

Last, you're cutting your lining and batting pieces:
- cut two pieces of lining fabric at 7.25" x 9"
- cut two pieces of batting at 7.25" x 9"
Now let's get started. Place the main exterior 4" x 9" fabric right side up on your table. With the zipper facing down, place it over the main exterior fabric, with the zipper pull on your left side. Now place the 4" x 9" zipper lining fabric wrong side up on top of your zipper. Pin in place.
Using your zipper foot attachment, sew along the edge of the zipper.
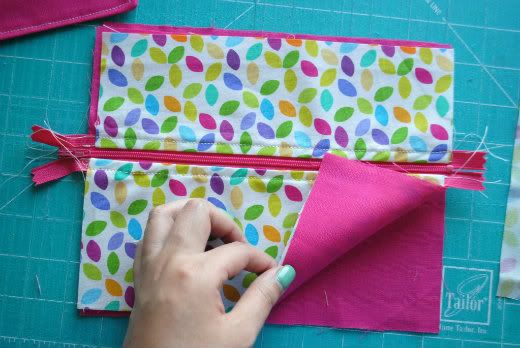
Pull both fabric pieces to the opposite side so that the zipper is exposed. Press.

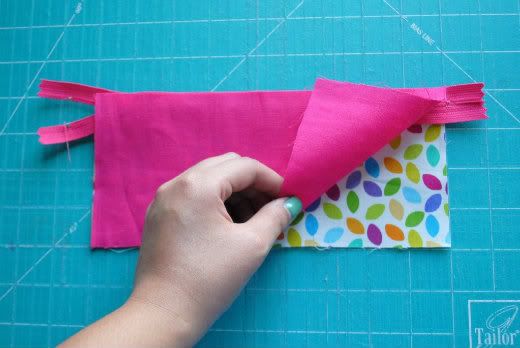
Now place your 3.5" x 9" exterior piece on the table right side up. Place the zipper over it facing down, with the zipper pull to the right this time. Now place the 3.5" x 9" zipper lining piece over the zipper, wrong side up. Pin in place and attach the zipper with your zipper foot.
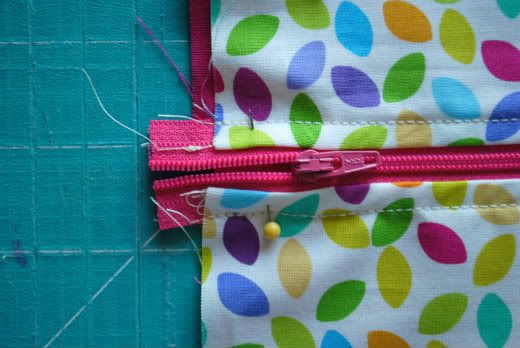
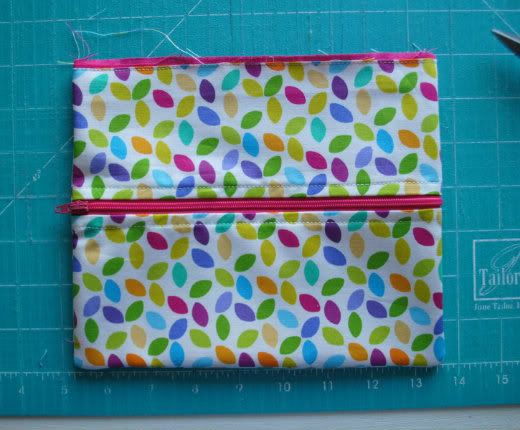
Once you've pressed both sides, you should be left with something like this.
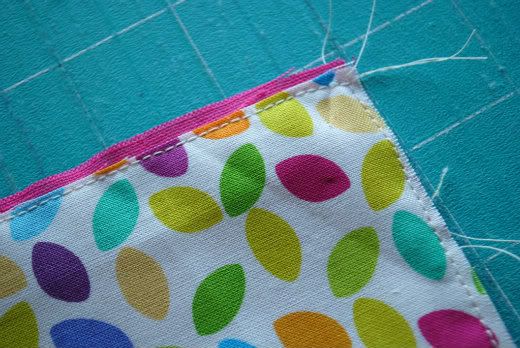
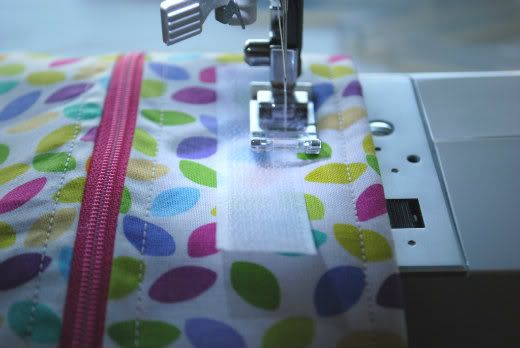
Now replace the zipper foot with your regular foot and top stitch along both sides of the zipper.
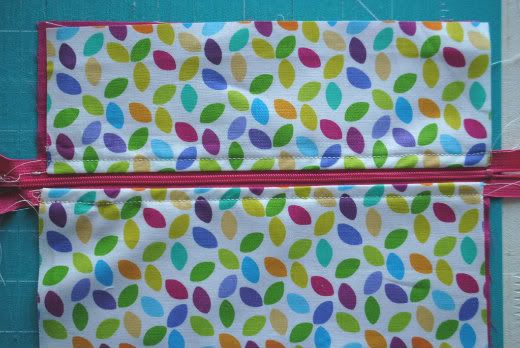
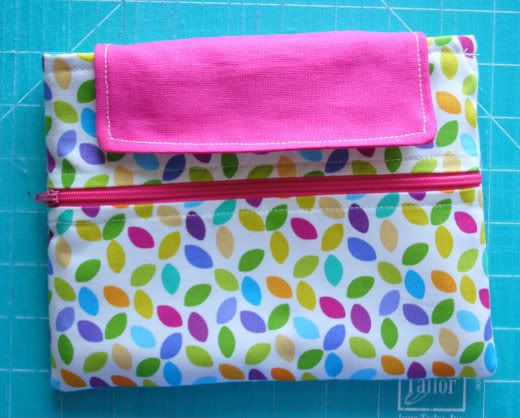
It should now look like this. Don't worry if your fabrics look a little off. We'll get to that later.
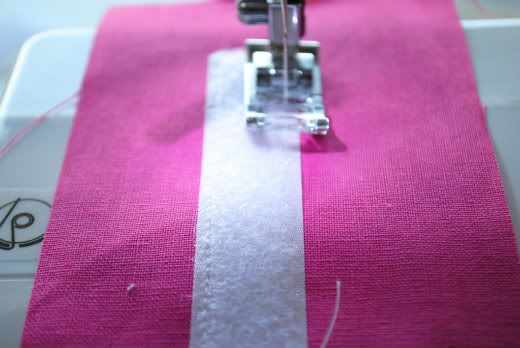
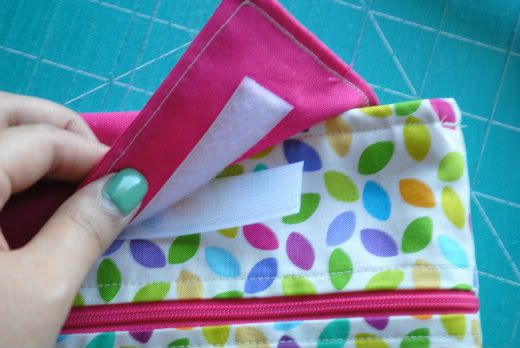
Grab one of your flap pieces and center the softer piece of velcro about 1" from the bottom. Pin in place and sew it on.
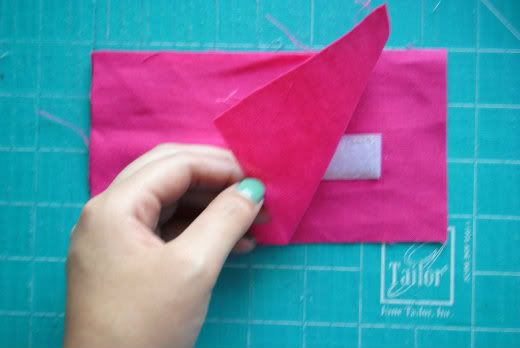
Place the two flap pieces right sides together and sew along three sides, leaving the top open for turning out. **Note- if you wish to add interfacing or batting to your flap, now is the time to do it**
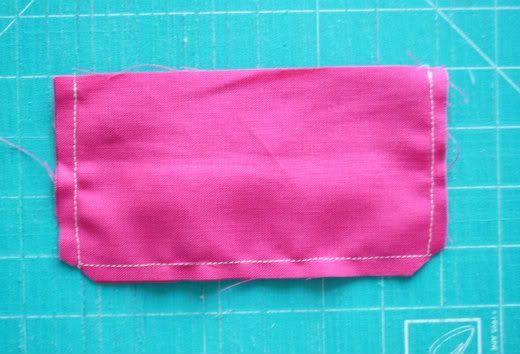
Clip your corners and turn right side out. Using a chopstick or pencil poke out your corners.
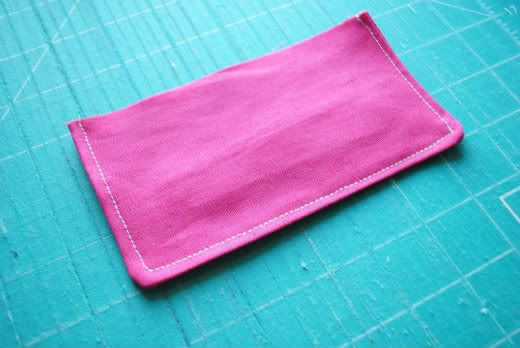
Top stitch along the three closed sides, once again leaving the top open. Set aside.
Now place the 7.25" x 9" zipper lining piece on the table right side up. Place the assemble front exterior piece on top of the lining piece also right side up. Pin in place.
Make sure to leave the zipper slightly open so your sewing foot won't get stuck. Use a pin to help keep the two zipper sides together.
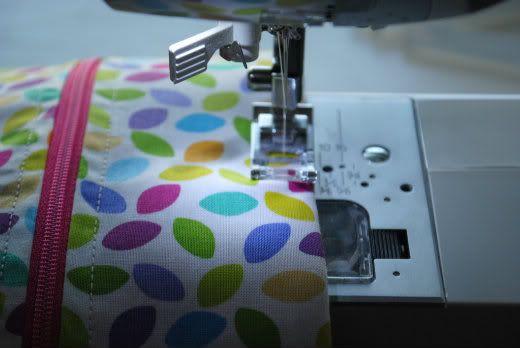
Machine baste around all four sides as close to the edge as you can get.
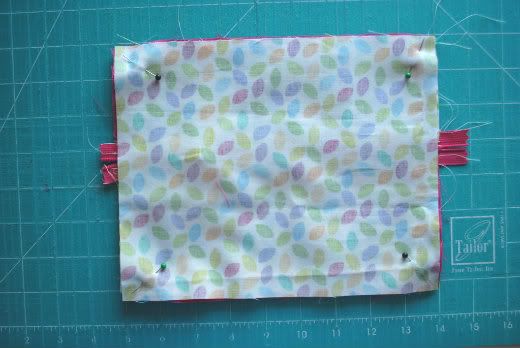
Now place the 7.25" x 9" exterior fabric piece over the assembled front exterior piece, right sides together, leaving the zipper slightly open. Pin in place and sew along three sides, leaving the top open.
Clip corners and trim off the excess zipper. Turn right side out and poke out the corners. Set aside.
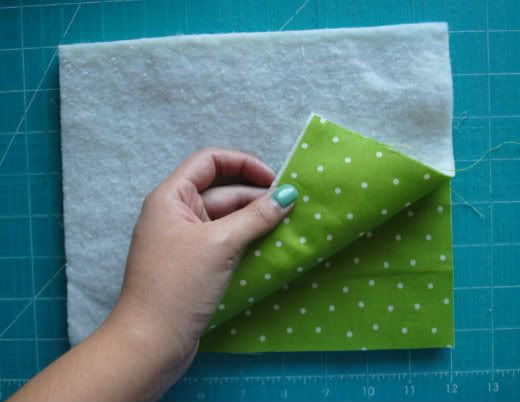
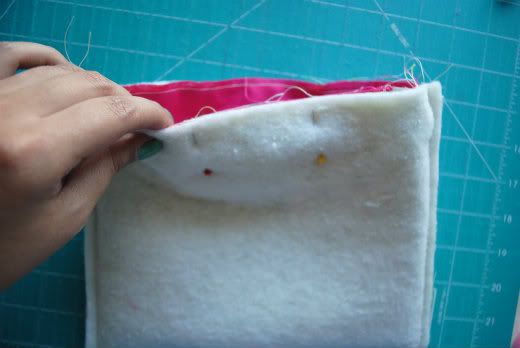
Place your batting pieces behind each of your lining pieces. Place them right sides together and pin in place.
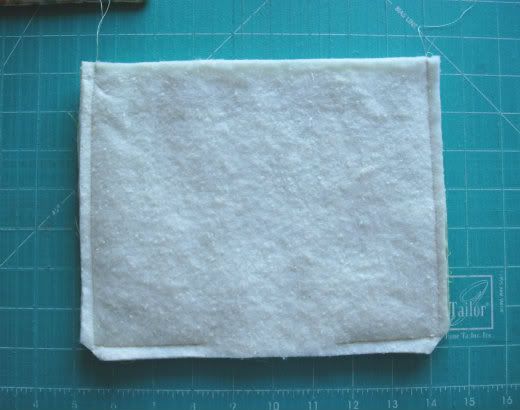
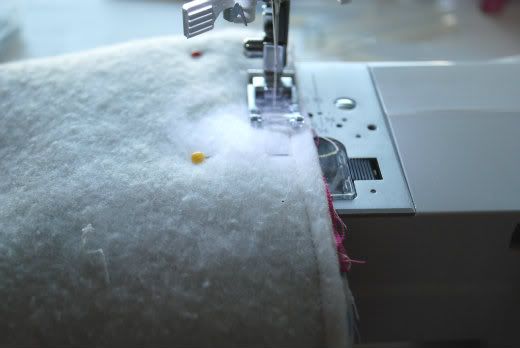
Sew along three sides again, leaving a 3" opening at the bottom for turning. Clip corners.
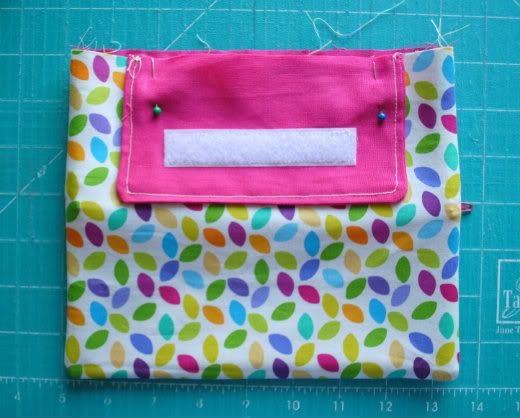
Center the flap to the back of the assembled exterior piece, velcro out, and pin in place.
Place the entire exterior pouch inside the lining pouch, right sides together. Make sure the flap is between the exterior and lining pieces. Pin all around.
Sew all the way around at 1/4" and again at 3/8". Remove all pins and turn right side out. Sew the opening of the lining closed either by hand or with your machine.
Tuck the lining in and press along the opening of your case. Topstitch all the way around.
Using the flap as a guide, pin the other side of the velcro on your pouch.
Sew the velcro onto the front of your pouch. And you're all done!
Now admire your new Leap Pad Case!
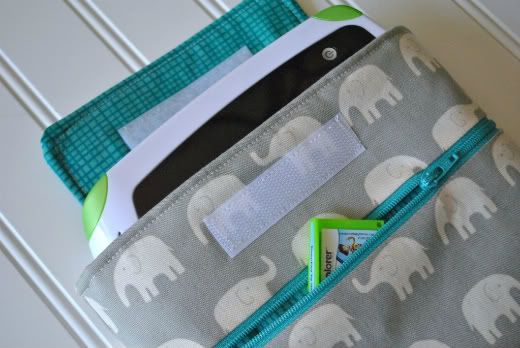
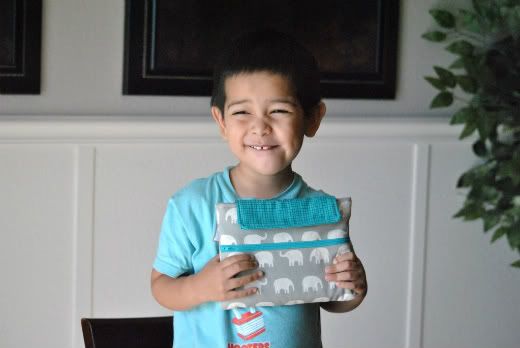
This will surely bring a smile to your little one's face! Hope you enjoy making this. If you have any questions at all about this tutorial or feel that my instructions are hard to follow, please feel free to email me about it! I'll be more than happy to help you out!
I have been getting a lot of emails inquiring about the Leap Pad Case I had made for AJ. I had put together a pattern that was meant to be tested by some readers and then put in my etsy shop for sale. However, with the closing of my etsy shop, all those plans went out the window. Although, I have since re-opened my shop (yay!), I decided to post the tutorial on my blog for free instead. Thank you all for being so patient!
For this project, you will need the following materials:
- Three different kinds of fabric
- 10" zipper
- 3.5" of sew-in velcro
- cotton batting
- lightweight fusible interfacing (optional)
First off, you're going to cut your zipper lining and flap pieces:
- cut one piece at 7.25" x 9"
- cut one piece at 3.25" x 9"
- cut one piece at 4" x 9"
- cut two pieces at 3.5" x 6.5"
Now you're going to cut your main exterior panels and fusible interfacing:
- cut one piece of main fabric and interfacing at 7.25" x 9"
- cut one piece of main fabric and interfacing at 3.25" x 9"
- cut one piece of main fabric and interfacing at 4" x 9"
Iron the fusible interfacing to the wrong side of these fabric pieces according to the directions on your interfacing.
Last, you're cutting your lining and batting pieces:
- cut two pieces of lining fabric at 7.25" x 9"
- cut two pieces of batting at 7.25" x 9"
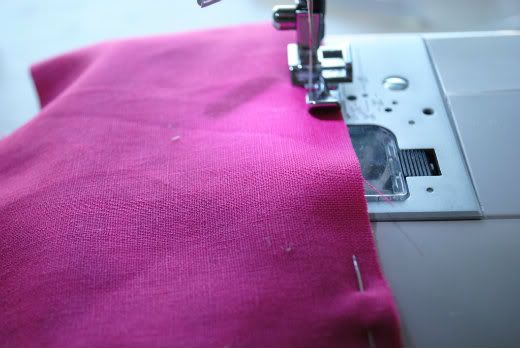
Now let's get started. Place the main exterior 4" x 9" fabric right side up on your table. With the zipper facing down, place it over the main exterior fabric, with the zipper pull on your left side. Now place the 4" x 9" zipper lining fabric wrong side up on top of your zipper. Pin in place.
Using your zipper foot attachment, sew along the edge of the zipper.
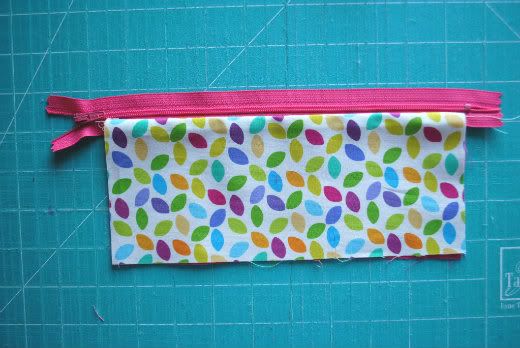
Pull both fabric pieces to the opposite side so that the zipper is exposed. Press.
Now place your 3.5" x 9" exterior piece on the table right side up. Place the zipper over it facing down, with the zipper pull to the right this time. Now place the 3.5" x 9" zipper lining piece over the zipper, wrong side up. Pin in place and attach the zipper with your zipper foot.
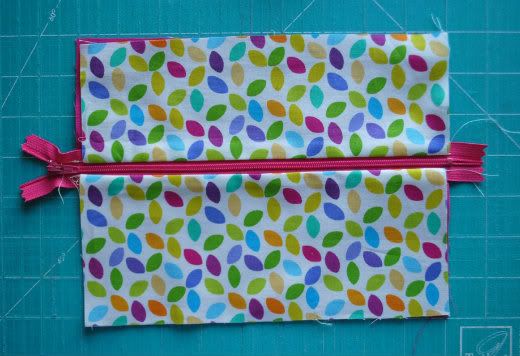
Once you've pressed both sides, you should be left with something like this.
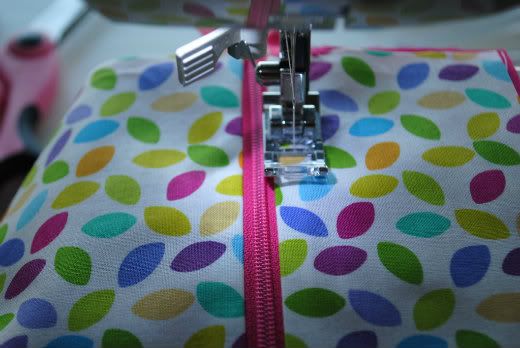
Now replace the zipper foot with your regular foot and top stitch along both sides of the zipper.
It should now look like this. Don't worry if your fabrics look a little off. We'll get to that later.
Grab one of your flap pieces and center the softer piece of velcro about 1" from the bottom. Pin in place and sew it on.
Place the two flap pieces right sides together and sew along three sides, leaving the top open for turning out. **Note- if you wish to add interfacing or batting to your flap, now is the time to do it**
Clip your corners and turn right side out. Using a chopstick or pencil poke out your corners.
Top stitch along the three closed sides, once again leaving the top open. Set aside.
Now place the 7.25" x 9" zipper lining piece on the table right side up. Place the assemble front exterior piece on top of the lining piece also right side up. Pin in place.
Make sure to leave the zipper slightly open so your sewing foot won't get stuck. Use a pin to help keep the two zipper sides together.
Machine baste around all four sides as close to the edge as you can get.
Now place the 7.25" x 9" exterior fabric piece over the assembled front exterior piece, right sides together, leaving the zipper slightly open. Pin in place and sew along three sides, leaving the top open.
Clip corners and trim off the excess zipper. Turn right side out and poke out the corners. Set aside.
Place your batting pieces behind each of your lining pieces. Place them right sides together and pin in place.
Sew along three sides again, leaving a 3" opening at the bottom for turning. Clip corners.
Center the flap to the back of the assembled exterior piece, velcro out, and pin in place.
Place the entire exterior pouch inside the lining pouch, right sides together. Make sure the flap is between the exterior and lining pieces. Pin all around.
Sew all the way around at 1/4" and again at 3/8". Remove all pins and turn right side out. Sew the opening of the lining closed either by hand or with your machine.
Tuck the lining in and press along the opening of your case. Topstitch all the way around.
Using the flap as a guide, pin the other side of the velcro on your pouch.
Sew the velcro onto the front of your pouch. And you're all done!
Now admire your new Leap Pad Case!
This will surely bring a smile to your little one's face! Hope you enjoy making this. If you have any questions at all about this tutorial or feel that my instructions are hard to follow, please feel free to email me about it! I'll be more than happy to help you out!
Subscribe to:
Posts (Atom)